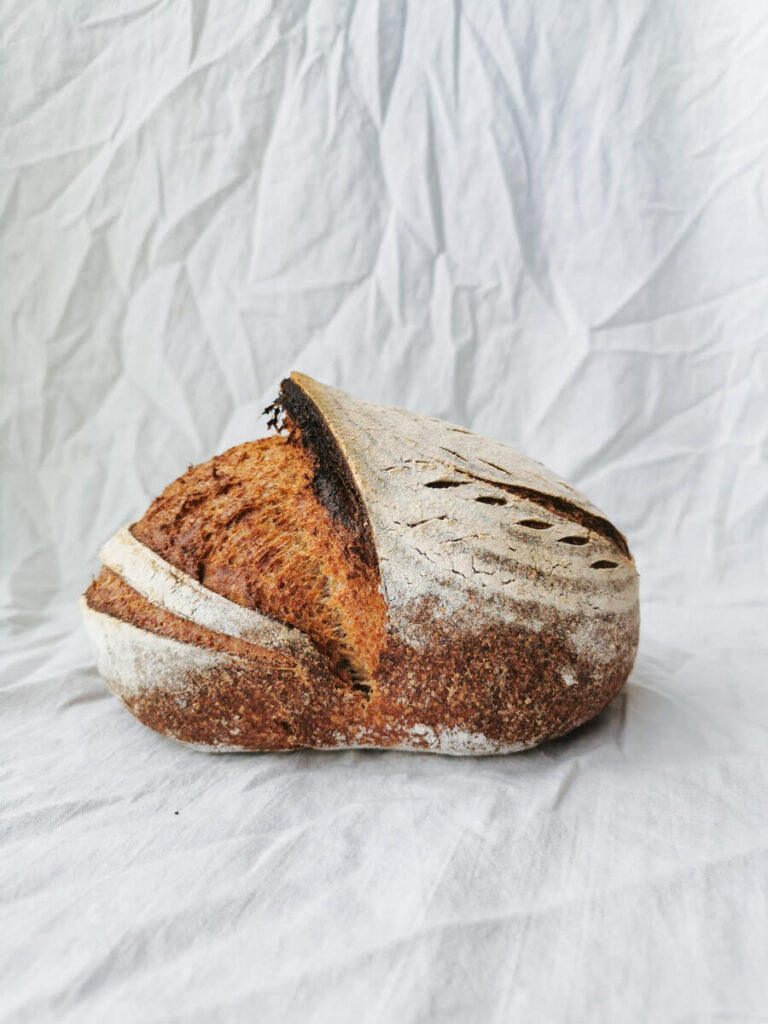
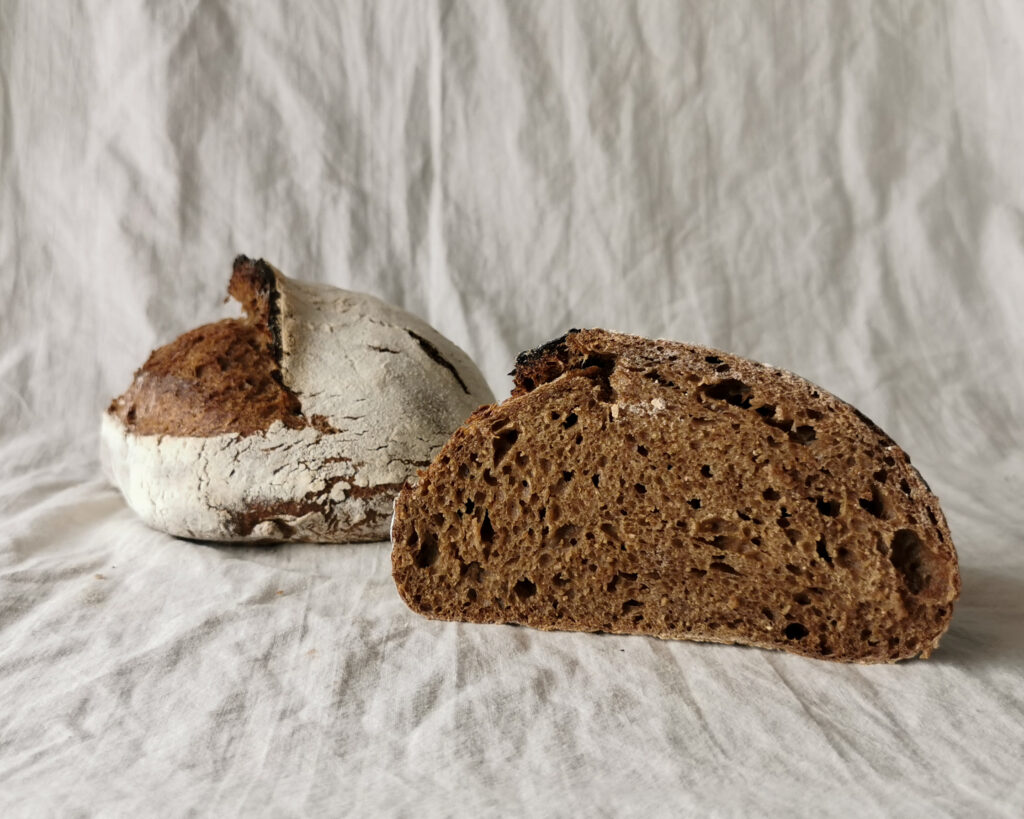
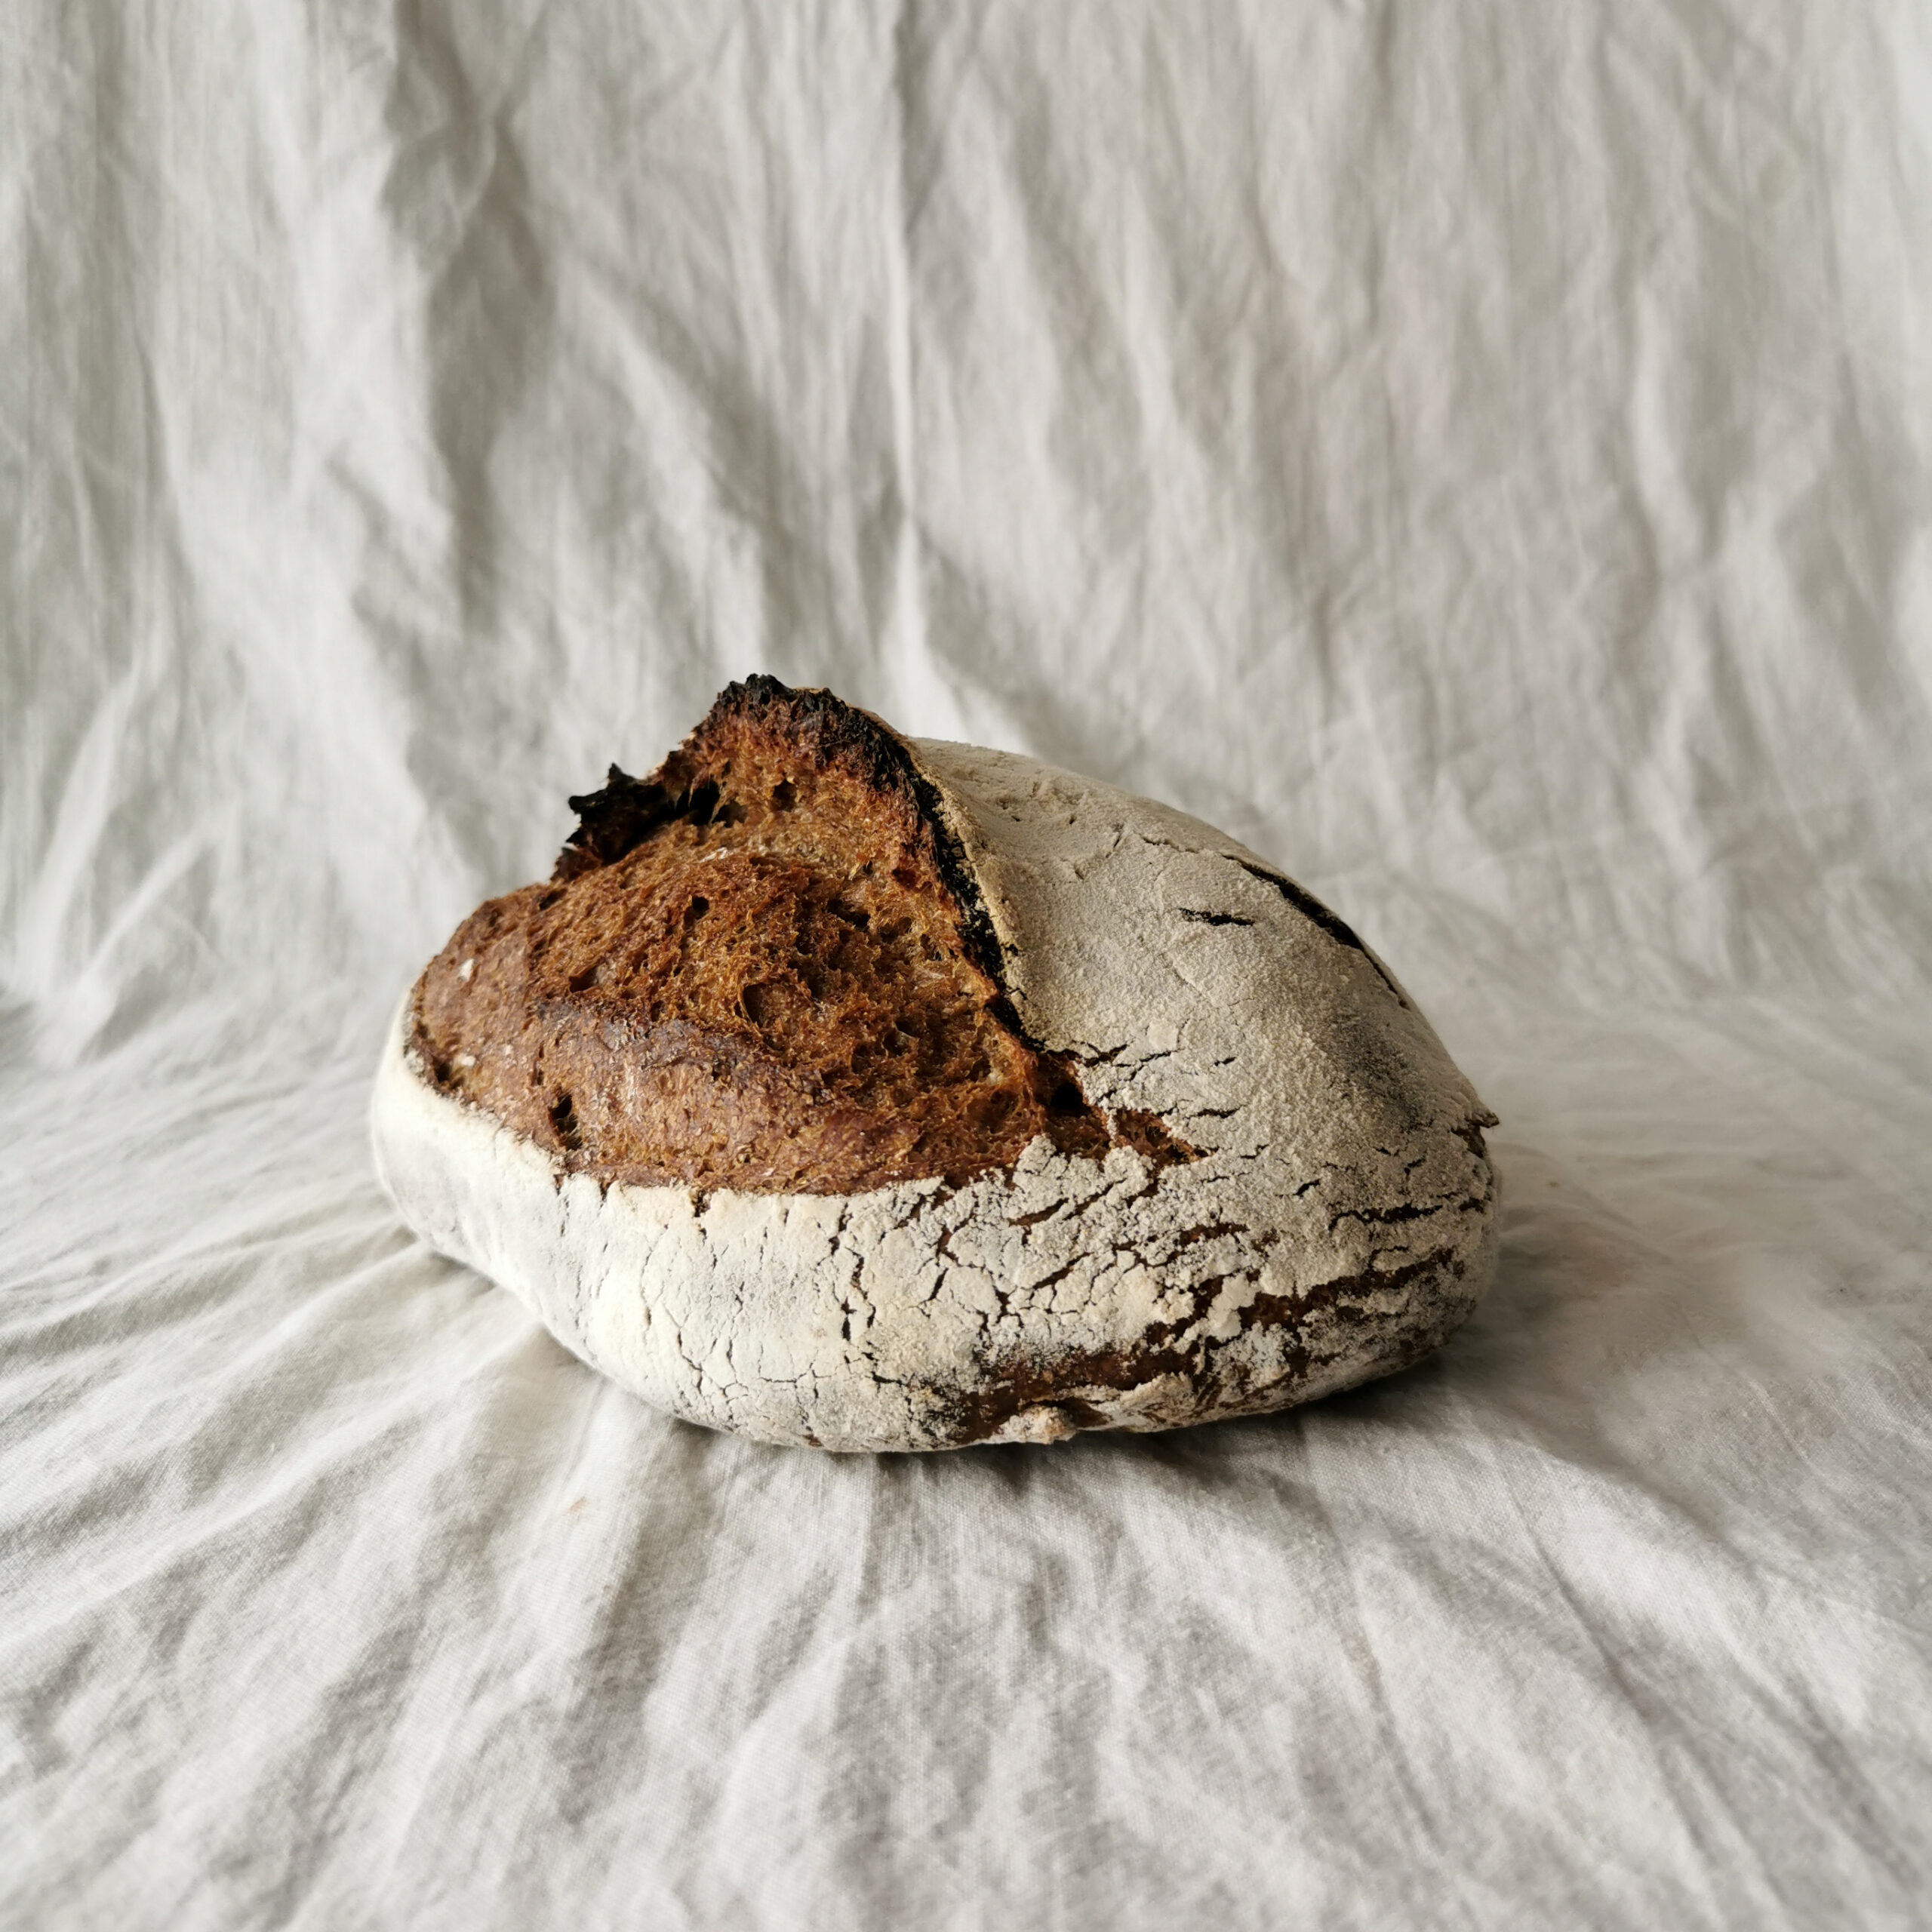
This is a super easy forgiving bread recipe that is good for beginners and advanced bread bakers. The rye ensures that, although the bread is ready in one day, it is still full of flavour. When you bite through the crispy crust, the fragrant aromas escape and a soft and airy crumb emerges. In short: a real winner!
It is a sourdough bread recipe so an active starter is needed. Make sure you activate it on time. For me, this is usually about 8-9 hours after feeding in the ratio 1:2:2 (so 1 part desem + two parts water and flour). For this recipe, 100 grams of starter is needed, so I fed 20 grams of starter with 40 grams of water and 40 grams of flour. My starter is fed on a base of rye and wheat flour. For this recipe it doesn’t matter very much on which base your starter is, as long as it is active.
This bread recipe is formed according to the 3-2-1 method. 3 parts flour, 2 parts water and 1 part sourdough. Because this is a rather large amount of starter compared to many other recipes, the dough will probably rise faster, which makes the baking process easy to complete in one day. This means that you can soon enjoy this delicious bread!
One-Day No Knead Sourdough Bread
Ingrediënten
Equipment
Method
- Mix all the flour in a bowl and stir well so that it is well distributed. Then add the water and the sourdough. Stir so that all the water is absorbed and everything is mixed together. Do not stir too long, it should not be kneaded yet. Leave this to stand for at least 20 minutes in a covered bowl.
- Add the salt. (If the dough is not very moist yet, you can dissolve the salt in a little water, and add that. Otherwise, just add the salt dry). Mix it through the dough by kneading it briefly with your hand. This works best on the work surface, but can also be done in the bowl. Put the dough back in the bowl and cover it.
- The bulk fermentation is the first fermentation (also called the first rise or primary fermentation). During the beginning of this fermentation you perform stretch and fold (see beneath). How long this step takes depends on many factors and is therefore difficult to say. In my case, it took about 3 hours. The fermentation is finished when it has (almost) doubled in size, the surface has become smooth, and if you shake it a bit it moves like a pudding. You are looking for an airy and bubbly dough, and if you prick it with a wet finger, the dough does not spring back immediately.
- Stretch the dough every 30 minutes by streching and folding. Do this 3 to 4 times in total and then leave it in the covered bowl for the rest of the bulk fermentation. A stretch and fold is done by stretching the North side of the dough with wet hands and then folding it towards you, over the dough. Do this for all sides, so East, South and West. Then turn the dough upside down, so that the folds are at the bottom, and let it rest like that.
- Place the dough on a greased or floured workbench, and form it into a ball by bringing your hands down from on top of the dough while turning it on the workbench. This way you create tension on the surface of the dough. Do this with quick movements so that it does not stick to your hands. Cover the dough with plastic foil and let it rest for 20 minutes.
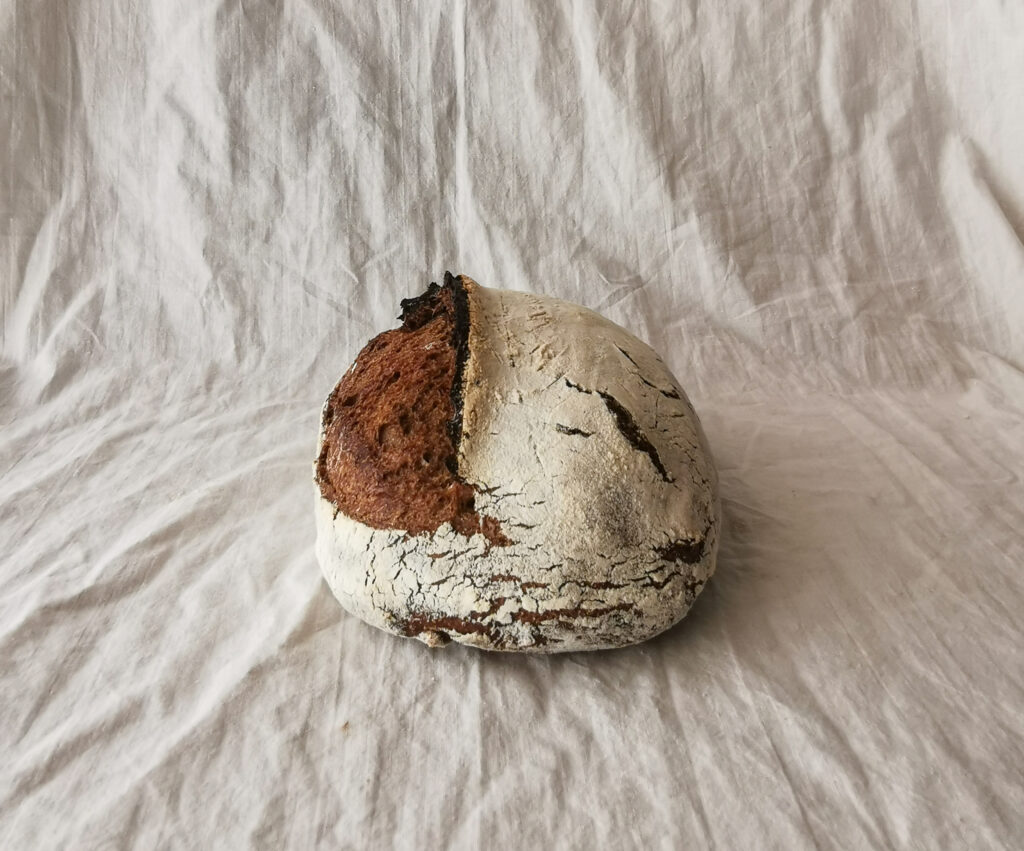
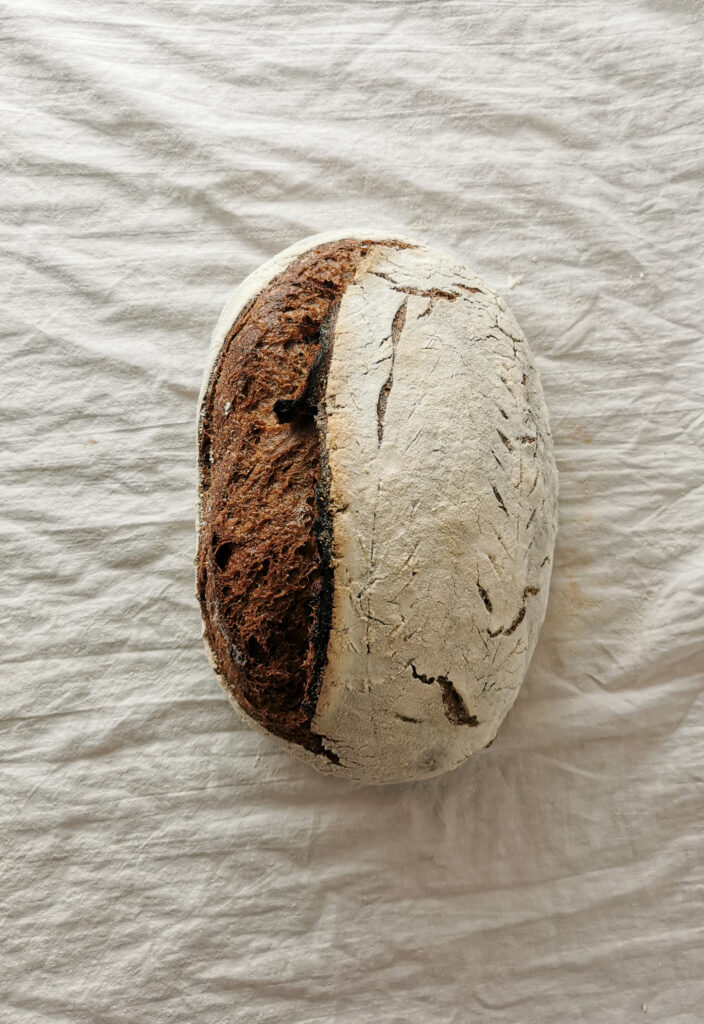
- Prepare a richly floured proofing basket or bowl. Flour the top of the dough and turn it upside down. make a stretch and fold and turn it upside down again so that the floured side is on top. Shape the loaf by putting tension on the dough by making the same movement as for pre-shaping a round loaf. Flour the top of the dough and place it upside down in the basket or bowl for proofing.
- Allow the dough to proof. How long this takes varies, usually around 1.5 – 3 hours. Mine took about 2.5 hours, of which 30 minutes in the fridge. The dough is ready when it has grown bigger, it looks bubbly and airy, when you press on the side with a wet finger, the other side of the dough also moves with it and it doesn't resist too much, and your fingerprint slowly springs back. If your fingerprint stays put; hurry up because then it is already overripe. If your fingerprint immediately bounces back, let it rise for a while and keep an eye on it.
- Preheat the oven to 230 degrees Celsius one hour before baking. Heat a dutch oven or a roasting tin with it. Carefully release the dough from the proofing basket onto the baking tray or into the dutch oven. Cut the dough with a sharp knife or a lame with a loose grip and a quick movement a few times. Spray hot water into the dutch oven with a plant spray and quickly close the lid. Or pour 1.5 dl water (watch out for hands and steam) into the roasting tin. Bake the bread for 20 minutes and then remove the lid of the dutch oven or the roasting tin from the oven. Lower the temperature to 180/200 degrees and bake the bread for another 20 minutes. Place the bread on a wire rack immediately after baking and allow to cool completely before cutting. Bon appetit!
Notities
- No Rye Flour? Replace the rye flour with whole wheat flour and continue the recipe.
- No Malt Flour? No problem, you can just leave it out. Malt flour is just for a darker colour and slightly adds some taste.
- More flavour? You can also choose to proof the dough in the fridge overnight (around 12 hours) and bake it in the morning. This will allow the bread to develop more flavour. Bake it straight out of the fridge! No worries when it didn’t dubble in size, it will rise in the oven!